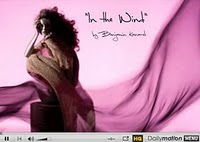
Benjamin Kanarek "In the Wind" Fashion "Paul & Joe" Paris
Uploaded by benjaminkanarekblog. - More lifestyle, fashion and how-to videos.
Check out this wonderful behind the scenes video by Pro Fashion Photographer Benjamin Kanarek on his blog here, whose images have graced the covers of Elle and Vogue from time to time. In this video, you see the creative ways Benjamin used hard flash light and mixed them with gelled H.M.I lights with a little shutter delay and some cool photo editing by Freddy Baby, Paris. Some reverse engineering on lighting inside.
First of all, we would like to thank Benjamin for sharing his techniques, though he didn't give details, the video speaks it all for any trained eye. Heres a breakdown for those who still couldn't figure out.
Take a good look at the video from the link provided to his blog above.
Target:
From what we see, the aim was to blend fashion with little bit motion and colors to show spring collection in an upmarket hi end style.
Team:
No matter how good the photographer is, the final image is only as good as the weakest link in the team. This video is perfect example of team work with everyone at their creative best. In one scene we see the stylist or MUA helping to set up the wind machine(fan). It helps to have people like this around to build a healthy creative atmosphere. Look at the model. She is the perfect example of what a model is required to do. With just the basic explanation of the theme, she just took off...and was spontaneous with her variety of poses. Hair was perfect to show motion, yet stylish. You see Benjamin directing the hair stylist in the beginning. And of course, since this blog gives equal importance to Photo Editing, there are some wonderful seamless retouching in there which just makes the picture and image.
Lighting:
To achieve this effect, Benjamin has used some H.M.I with magenta gels on them....i see around 2...to light the entire background....along with 2 flashes with magenta gels probably at low power.
The main light, is a hard light from flash with reflector, at a height higher than the models head and place at extreme right of camera for some shots and lon left for other shots. The light is high providing side light to the model and has a flag/cutter/gobo below it so that the light concentrates on face and mid body. Below the main light is another hardlight with a mixed pink and blue gel lighting the floor and feet area. You can see the nice contrast and the hard shadows this light creates.
Note the scrims and flags used to cahnnel the light and prevent the backlight from spilling on the model and to avoid flare in the lens.
Motion:
As you can see, there is motion blur in the model movements and dresses. A mix of techniques have been used here. Obviously....people are moving the cloth on behind....so that is one. This, and the model movements have been captured in camera by keeping a slow shutter speed, i guess either 1sec or little bit less than that. This also helps to balance the exposure between the H.M.I lights(which need longer exposure) and the flash lights. The motions have been more enhanced by the photo editing using blur techniques in various layers and blending them into one for the final image....along with some selective desaturation toning.
Please read the comments below where Benjamin fine tunes our reverse engineering with some facts.


